Recent Posts
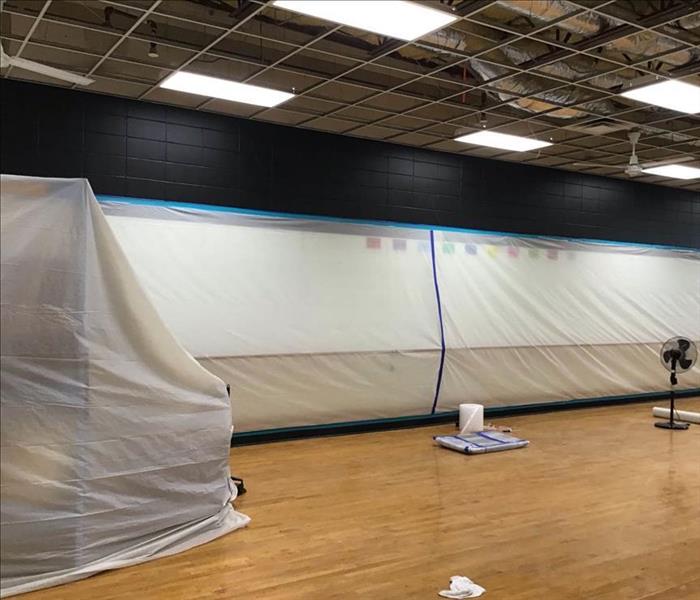
The Importance of Prompt Storm Damage Cleanup: Mitigating Risks and Restoring Your Home
1/4/2024 (Permalink)
Natural disasters, such as storms and hurricanes, can cause devastating damage to our homes and communities. In the aftermath of these events, it's essential to take swift action to mitigate further damage and restore our properties. Delaying storm damage cleanup can lead to significant problems, such as mold growth and structural damage. In this blog, we will explore the importance of prompt storm damage cleanup and how taking quick action can protect your home and ensure a faster and more efficient recovery.
The Risks of Delaying Storm Damage Cleanup
- Discussing the potential consequences of waiting to address storm damage, such as weakened structures and further water damage.
- Highlighting the risk of mold growth from water damage, which can cause health issues and complicate the restoration process.
- Emphasizing the importance of acting fast to mitigate risks and prevent secondary damages.
Minimizing Further Damage with Immediate Cleanup
- Detailing the importance of taking action as soon as it's safe to enter your home after a storm.
- Discussing the key steps involved in prompt cleanup, such as removing standing water, drying out materials, and inspecting for structural damage.
- Highlighting the benefits of quick action, including the minimization of risks and more straightforward restoration efforts.
Professional Storm Damage Cleanup Services
- Exploring the advantages of hiring professional storm cleanup services, such as SERVPRO®, to handle the restoration process.
- Discussing the expertise and specialized equipment that professionals bring to the recovery process, such as industrial-grade dehumidifiers and air movers.
- Highlighting the benefits of a comprehensive restoration plan, which addresses all aspects of storm damage, including water extraction, damage assessment, and structural repairs.
Protecting Your Health During Cleanup
- Discussing the potential hazards associated with storm damage, such as mold growth and exposure to harmful chemicals.
- Highlighting the importance of proper safety gear, such as gloves and masks, during cleanup to minimize exposure to hazards.
- Educating homeowners on the significance of avoiding any areas that may present potential health hazards and leaving those areas to the professionals.
A Faster and More Efficient Recovery
- Discussing the benefits of a swift and comprehensive storm cleanup in speeding up the recovery process.
- Highlighting the role that professional restoration services play in minimizing costly damage and reducing the overall cost of recovery efforts.
- Emphasizing the importance of not delaying cleanup to avoid compounding the damage and lengthening the restoration process.
Prompt storm damage cleanup is crucial in minimizing risks and restoring your home as quickly and effectively as possible. By acting fast and enlisting the services of professional restoration companies, such as SERVPRO®, you can mitigate further damage, protect your health, and ensure a faster and more efficient recovery. Don't delay – take action today to restore your home and regain a sense of normalcy after a storm.
Rising from the Ashes: Restoring and Repairing Fire-Damaged Walls and Ceilings
11/30/2023 (Permalink)
When a fire strikes, the damage left behind can be devastating. The walls and ceilings in a property often bear the brunt of the destruction, leaving them charred, stained, and structurally compromised. Restoring and repairing fire-damaged walls and ceilings requires expertise, careful assessment, and a systematic approach. In this blog, we will delve into the steps involved in restoring these vital elements of a property to their pre-fire condition.
Safety First
Before beginning any restoration work, ensure that the area is safe to enter. Check for structural stability, potential hazards, and make sure to wear appropriate protective gear, including gloves, goggles, and a respirator.
Assessment and Cleaning
Begin the restoration process by thoroughly assessing the extent of the damage. Remove any loose debris, soot, or charred materials from the walls and ceilings. Use a vacuum cleaner equipped with a HEPA filter to gently remove loose soot particles, taking care not to spread them further.
Smoke and Soot Removal
Smoke and soot can penetrate deeply into the porous surfaces of walls and ceilings. To effectively remove these contaminants, use specialized cleaning solutions or enlist the help of professional fire damage restoration services. The cleaning method may vary depending on the surface material, such as drywall, plaster, or wood paneling. Follow manufacturer instructions or the guidance of professionals to ensure thorough cleaning and removal of smoke and soot residue.
Surface Preparation
Once the smoke and soot have been removed, it is essential to prepare the surfaces for repair. This involves smoothing out uneven areas, filling in cracks or holes, and ensuring proper adhesion for the subsequent layers of paint or texture. Use suitable patching compounds, spackle, or joint compound to repair damaged areas. Sand the patched areas to achieve a smooth surface.
Priming and Painting
Applying a primer is crucial to seal the repaired surfaces and provide a uniform base for the paint. Choose a primer specifically designed for fire damage restoration, as it can help to block any remaining odors and prevent stains from bleeding through the paint. After the primer has dried, select a paint color and type suitable for your desired finish. Apply multiple coats of paint, ensuring complete coverage to restore the walls and ceilings to their original appearance.
Texture Matching
If your walls or ceilings had a textured finish before the fire, it is necessary to match the texture during the restoration process. Texture can be replicated using specialized tools, such as brushes, sponges, or specialized sprayers. Practice on a small area or seek guidance from professionals to achieve a seamless texture match.
Professional Assistance
Restoring fire-damaged walls and ceilings can be a complex task. If the damage is extensive or if you lack experience, it is advisable to consult with professional fire damage restoration services. These experts have the necessary knowledge, skills, and equipment to evaluate, restore, and repair fire-damaged walls and ceilings safely and effectively.
In conclusion, restoring and repairing fire-damaged walls and ceilings requires a systematic and careful approach. From thorough assessment and cleaning to proper surface preparation, priming, painting, and texture matching, each step is crucial to achieving a successful restoration. However, in the case of extensive damage or if you are unsure about the process, it is recommended to seek professional assistance to ensure the best possible outcome. With careful restoration, these walls and ceilings can rise from the ashes and be restored to their pre-fire condition.
Why Does Persistent Mold Keep Coming Back?
11/19/2023 (Permalink)
 If you have taken all the necessary steps to prevent mold but it keeps coming back, it's beneficial to consult with a professional mold specialist.
Dealing with recurring mold growth can be frustrating. Whether it's in your bathroom, kitchen, or any other area of your home, understanding why mold keeps coming back is essential to effectively address the issue. In this blog, we will explore some common reasons behind the persistence of mold growth, without mentioning any health risks or concerns.
Moisture and Humidity
Mold thrives in moist and humid environments. If mold keeps reappearing, it indicates that there may be underlying moisture issues. Leaky pipes, roof leaks, or poor ventilation can contribute to excessive moisture and create a favorable environment for mold growth. To prevent the recurrence of mold, it's crucial to identify and fix the sources of moisture. Repair any leaks promptly, improve ventilation in areas prone to high humidity, and use dehumidifiers if necessary.
Inadequate Cleaning
Improper cleaning can also be a contributory factor in recurring mold growth. Superficially removing visible mold without addressing the spores and mold colonies can lead to its re-emergence. It's essential to thoroughly clean affected surfaces, using appropriate cleaning agents specifically designed for eliminating mold. Ensure that you scrub effectively and reach all the nooks and crannies where mold can hide. Additionally, using mold-resistant products for repairing or renovating areas prone to mold growth can help prevent future occurrences.
Insufficient Drying
After cleaning, it is crucial to allow the affected areas to dry completely. Moisture can remain in hidden or hard-to-reach areas, providing an opportunity for mold to regrow. Insufficiently drying surfaces or materials affected by water damage can contribute to recurring mold problems. Properly ventilate the area, use fans, and dehumidifiers as needed to promote thorough drying. Be thorough in addressing any water intrusion or condensation issues and ensure that affected areas are completely dry before closing them off.
Poor Maintenance
A lack of regular maintenance can also contribute to the recurrence of mold. Neglecting routine cleaning and upkeep can allow mold to grow unabated. Regularly inspect your home for any signs of water damage, leaks, or areas with high humidity. Promptly address these issues and take preventive measures such as applying mold-resistant products, regularly cleaning and drying vulnerable areas, and maintaining proper ventilation. By being proactive in maintenance, you can minimize the conditions that facilitate mold growth and reduce the chances of it coming back.
In some cases, the persistence of mold growth may indicate a larger underlying problem, such as structural issues or extensive water damage. If you have taken all the necessary steps to prevent mold but it continues to come back, it may be beneficial to consult with a professional mold remediation specialist. These experts have the knowledge and expertise to assess the situation, identify any hidden sources of moisture, and implement appropriate remediation measures. They can help you address the root cause of the mold problem and ensure a long-term solution, providing you with peace of mind and a mold-free environment in your home.
Emergency Preparedness: Creating a Water Damage Escape Plan
10/23/2023 (Permalink)
Water damage emergencies can occur suddenly and without warning. Whether it's a burst pipe, a severe storm, or a flooded basement, having a water damage escape plan in place is essential to protect yourself, your loved ones, and your property. In this blog post, we will guide you through the steps of creating an effective water damage escape plan to ensure your safety during an emergency.
Assess Potential Risks
Begin by assessing the potential risks in your home that could lead to water damage. Identify areas prone to flooding, such as basements or low-lying areas, and inspect pipes and appliances for potential leaks or weaknesses.
Plan Your Escape Routes
Take the time to plan and identify multiple escape routes from each room in your home. Ensure that windows, doors, and hallways are clear of any obstacles that could hinder your evacuation.
Establish a Meeting Point
Designate a specific meeting point outside your home where all family members or household occupants should gather after evacuating. This will help emergency responders account for everyone's safety and reunite your loved ones quickly.
Ensure Adequate Communication
Make sure you have multiple ways to communicate during an emergency. Keep a charged cell phone and consider having a battery-powered emergency radio as a backup. In addition, establish an out-of-town contact who can act as a central point of communication in case local lines are down.
Prepare an Emergency Kit
As part of your water damage escape plan, assemble an emergency kit that includes essential supplies. Include items such as non-perishable food, water, a first aid kit, flashlights, batteries, a whistle, and any necessary medications. Store this kit in a portable container that can be easily accessed during an evacuation.
Consider Special Needs
If you have family members with special needs, plan accordingly. Ensure that you have any necessary assistive devices or equipment readily available and incorporate their specific needs into your water damage escape plan.
Practice Regularly
Practice makes perfect, so regularly conduct drills to familiarize everyone in your household with the water damage escape plan. Practice using different escape routes and teach family members how to shut off utilities, such as water, gas, and electricity, if necessary.
Reach Out to Professionals
Consider consulting with water damage restoration professionals to assess your home's susceptibility to water damage. They can provide guidance on preventative measures, such as installing sump pumps or sealing vulnerable areas, to mitigate potential risks.
Remember, creating a water damage escape plan is crucial for your safety and the safety of your loved ones. Take the time to create a plan that suits your home's specific needs and regularly review and update it as necessary. By planning ahead and being prepared, you can minimize the potential dangers and protect what matters most.
The Importance of Prompt Storm Damage Cleanup
10/3/2023 (Permalink)
Storms can wreak havoc on our homes and communities, causing significant damage and disrupting our lives. Whether it's a severe thunderstorm, hurricane, or tornado, the aftermath of such events can be overwhelming. One crucial aspect often overlooked is the prompt cleanup of storm damage. In this blog post, we will explore the importance of timely storm damage cleanup and its various benefits.
Minimizing Further Damage
After a storm, your property may be left with debris, fallen trees, damaged structures, and waterlogged areas. If left unaddressed, these can lead to additional damage. Prompt storm damage cleanup is essential in minimizing further harm to your property. With debris cleared and damaged structures secured, you can prevent potential hazards and save yourself from more extensive and costly repairs down the line.
Restoring Safety
Storm damage can pose safety risks, both immediate and long-term. Fallen trees and unstable structures can be hazardous to people and pets. There is also the risk of exposed electrical wires, weakened foundations, and weakened structures, which can lead to accidents and injuries. By promptly addressing storm damage, you can restore safety to your property, protecting yourself and your loved ones from potential harm.
Preventing Mold and Water Damage
Water intrusion is a common issue after storms, especially if there are leaks or flooding. Excessive moisture can lead to mold growth, which not only damages your property but also poses health risks. Mold can cause respiratory issues, allergies, and other health problems. By promptly cleaning up water damage and addressing moisture issues, you can prevent the onset of mold growth and reduce the risk of related health issues.
Insurance Purposes
Timely storm damage cleanup is crucial for insurance purposes. Most homeowners' insurance policies require policyholders to take immediate action to prevent further damage after a storm. Failure to do so may result in the denial of your insurance claim or limited coverage. By promptly cleaning up and documenting the damage, you can ensure that your insurance claim is processed smoothly, and you receive the coverage you are entitled to.
Restoring Normalcy
Storm damage can disrupt our daily lives and routines. Cleaning up the debris, repairing damage, and restoring your property to its pre-storm condition can help bring back a sense of normalcy. It allows you to return to your home or business, resume your regular activities, and move forward after a challenging event.
Environmental Impact
Prompt storm damage cleanup also plays a role in reducing the environmental impact of a storm. Debris left uncleared can contribute to pollution and harm ecosystems. By properly disposing of debris, recycling materials when possible, and addressing any hazardous materials, you can contribute to a cleaner and healthier environment.
Prompt storm damage cleanup is essential for minimizing further damage, restoring safety, preventing mold and water damage, complying with insurance requirements, and restoring normalcy after a storm. It not only protects your property and belongings but also ensures the well-being of your loved ones. If you have experienced storm damage, don't delay in taking action. Consult with professionals and take the necessary steps to clean up and restore your property promptly. By doing so, you can move forward and rebuild after the storm with confidence.
DIY Soot Web Removal: Safety Precautions and Step-by-Step Guide
8/13/2023 (Permalink)
 By following the step-by-step guide and implementing safety precautions, you can safely eliminate soot webs.
Soot webs can be a frustrating and unsightly issue for homeowners and property owners. These dark, sticky webs are formed when soot particles combine with moisture, creating a substance that attracts dust and other airborne particles. While professional cleaning services are available, some individuals may prefer a do-it-yourself (DIY) approach to removing soot webs. In this blog post, we will provide you with a step-by-step guide for DIY soot web removal, along with essential safety precautions to ensure a successful and safe cleaning process. By following these guidelines, you can effectively eliminate soot webs and restore the cleanliness of your home or property.
Safety Precautions
Wear Protective Gear
Before starting any cleaning process, it is crucial to prioritize your safety. Wear protective gear such as gloves, goggles, and a dust mask to shield yourself from potential respiratory irritants and allergens present in the soot webs.
Ensure Proper Ventilation
To avoid inhaling airborne particles and fumes, open windows and provide adequate ventilation in the area you are cleaning. This will help minimize the concentration of particles and improve air circulation.
Turn Off Heating/Cooling Systems
If the soot webs are present near heating or cooling vents, turn off the systems before cleaning. This prevents the spread of particles throughout your home or property and avoids potential damage to the HVAC system.
Step-by-Step Guide for Soot Web Removal
Step 1: Assess the Area
Thoroughly examine the affected area to identify the extent of the soot web accumulation. This will help determine the appropriate cleaning methods and tools needed.
Step 2: Prepare the Cleaning Solution
Mix a mild cleaning solution by combining warm water with a small amount of dish soap or a specialized soot cleaner. Avoid using harsh chemicals, as they may cause further damage to surfaces.
Step 3: Test on a Small Area
Before applying the cleaning solution to a larger surface, test it on a small, inconspicuous area to ensure it does not cause any discoloration or damage. Wait a few minutes and observe the test spot for adverse reactions.
Step 4: Vacuum Loose Soot
Using a vacuum cleaner with a brush attachment, gently vacuum the affected area to remove loose soot and debris. Be careful not to press too hard on delicate surfaces to avoid spreading the soot or causing damage.
Step 5: Wipe with Cleaning Solution
Dampen a soft cloth or sponge in the cleaning solution and wring out any excess liquid. Lightly wipe the soot webs, applying gentle pressure to loosen and remove the residue. Work in small sections and regularly rinse the cloth or sponge to prevent smearing.
Step 6: Rinse and Dry
Once you have removed the soot webs, rinse the cleaned area with a clean cloth or sponge dampened with plain water. Ensure that no cleaning solution residue remains. Thoroughly dry the surface using a dry cloth or allow it to air dry completely.
Step 7: Dispose of Waste Properly
Dispose of any collected soot and cleaning materials in a sealed bag to prevent spreading the particles. Follow your local regulations for waste disposal to ensure compliance.
DIY soot web removal can be an effective solution to restore cleanliness and aesthetics to your home or property. By following the step-by-step guide and implementing safety precautions, you can safely eliminate soot webs. However, if you are unsure about the extent of the issue or encounter stubborn soot webs, it is recommended to seek assistance from a professional restoration expert, such as SERVPRO of Tyler. Remember, regular maintenance and cleaning can help prevent the recurrence of soot webs, ensuring a clean and healthy living environment.
Essential Tips to Preserve Save Documents, Photos, and Books After Water Damage
7/14/2023 (Permalink)
Experiencing a water leak or flood can be devastating, especially when it comes to preserving your valuable documents, treasured photos, and cherished books. Water damage can quickly ruin these irreplaceable items if not handled properly. In this blog post, we will provide you with essential tips to save and restore your important documents, photos, and books after a water leak or flood. By following these steps, you can increase your chances of salvaging these precious possessions and preserving their sentimental and historical value.
Prioritize Safety and Stop the Water Source
Before attempting to salvage any items, it's crucial to prioritize your safety. Ensure that the affected area is safe to enter and the power supply is turned off to minimize the risk of electrical hazards. Once you've secured the area, stop the water source if it's still flowing. This may involve shutting off the main water valve or fixing the source of the leak.
Act Quickly
Time is of the essence when it comes to minimizing water damage to documents, photos, and books. The longer they remain soaked, the more difficult it becomes to restore them. Begin the restoration process as soon as it is safe to do so.
Handle Items with Care
When handling wet documents, photos, or books, use extreme care to avoid causing further damage. Wear gloves to protect delicate items from fingerprints, and handle them gently to prevent tearing or smudging. If possible, work on a clean, dry surface to prevent additional water absorption.
Separate and Air Dry
Separate the wet documents, photos, and books to prevent them from sticking together. Lay them out individually on a flat surface with good airflow, preferably in a dry and well-ventilated room. Avoid exposing them to direct sunlight, as it can cause further damage. If the items are covered in mud or debris, gently rinse them with clean, clear water before drying.
Utilize Dehumidifiers and Fans
To expedite the drying process, use dehumidifiers and fans in the affected area. These devices help reduce humidity levels and promote airflow, aiding in the evaporation of moisture from the documents, photos, and books. Rotate the items periodically to ensure even drying.
Freeze Wet Photos and Books
If you're unable to start the drying process immediately, or if the items are severely waterlogged, consider freezing them. Freezing halts the deterioration process, giving you more time to properly dry and restore them later. Place the wet photos or books in a plastic bag and seal it before putting them in the freezer. This temporary measure can prevent further damage until you're ready to work on them.
Seek Professional Help
In some cases, professional assistance may be necessary, especially for valuable or severely damaged items. Restoration experts, such as SERVPRO of Tyler, have the knowledge and specialized equipment to handle delicate restoration processes, such as freeze-drying or document restoration techniques. Contact a reputable document restoration company or conservator to assess the extent of the damage and provide guidance on the best course of action.
Prevent Future Water Damage
To prevent future water damage to your important documents, photos, and books, take preventive measures. Store them in waterproof or water-resistant containers or safes. Keep them away from basements, areas prone to flooding, or places where leaks are more likely to occur. Make digital copies of valuable documents and photos and store them securely in the cloud or on external hard drives as an extra layer of protection.
Water leaks and floods can pose a significant threat to your important documents, photos, and books. By acting quickly and following these essential tips, you can increase your chances of salvaging and restoring these precious possessions. Remember to prioritize safety, handle items with care, separate and air dry them, utilize dehumidifiers and fans, and consider professional assistance when needed. Taking preventive measures can also help safeguard your valuable items from future water damage. By implementing these steps, you can preserve the sentimental and historical value of your important documents, photos, and books for years to come.
Tips and Tricks on Preventing Water Damage to Keep Your Home Mold-Free
5/14/2023 (Permalink)
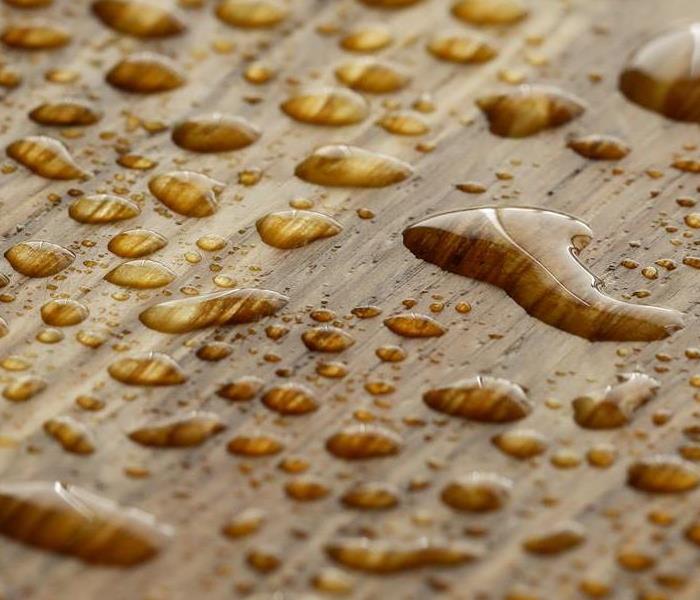 Preventing water damage is one of the best ways to prevent mold growth in the home.
Water damage is a common problem that homeowners face, especially in areas with heavy rainfall or prone to flooding. Water damage can occur due to a variety of reasons, including burst pipes, leaking roofs, or flooding. When water enters a home, it can seep into walls, ceilings, and floors, creating a moist environment that is conducive to mold growth.
Water damage and mold growth
Mold is a type of fungus that grows in damp and humid environments. When mold spores come into contact with moisture, they can quickly multiply and spread, causing damage to surfaces and structures in the home.
Preventing water damage is one of the best ways to prevent mold growth in the home. By preventing water from entering the home, homeowners can create an environment that is less hospitable to mold growth. Here are some ways that preventing water damage can help prevent mold.
Repair leaks promptly
Leaks from pipes, roofs, and windows can allow water to enter the home and create a damp environment that is conducive to mold growth. By repairing leaks promptly, homeowners can prevent water damage and reduce the risk of mold growth.
Keep gutters and downspouts clean
Gutters and downspouts are designed to channel water away from the home. If they are clogged with leaves and debris, water can back up and overflow, causing damage to the roof and walls. Keeping gutters and downspouts clean can prevent water damage and reduce the risk of mold growth.
Use a dehumidifier
High humidity levels can create a damp environment that is conducive to mold growth. Using a dehumidifier can help to reduce humidity levels and prevent mold growth.
Install proper ventilation
Proper ventilation is important in areas of the home that are prone to moisture, such as bathrooms and kitchens. Installing ventilation fans can help to remove excess moisture and prevent mold growth.
Inspect the home regularly
Regular inspections of the home can help to identify potential sources of water damage, such as leaks or cracks in the foundation. Addressing these issues promptly can prevent water damage and reduce the risk of mold growth.
The importance of preventing water damage
Preventing water damage is not only important for preventing mold growth, but it can also help to protect the structural integrity of the home. Water damage can weaken the structure of the home, causing damage to walls, ceilings, and floors. By preventing water damage, homeowners can ensure that their home remains safe and secure.
Preventing water damage is the key to keeping your home safe and mold-free
Preventing water damage is one of the best ways to prevent mold growth in the home. By repairing leaks promptly, keeping gutters and downspouts clean, using a dehumidifier, installing proper ventilation, and inspecting the home regularly, homeowners can create an environment that is less hospitable to mold growth. Preventing water damage is not only important for preventing mold growth, but it can also help to protect the structural integrity of the home. By taking steps to prevent water damage, homeowners can ensure that their home remains safe, secure, and mold-free.
Smoke Detectors for Family Homes: How to Choose the Right One for Your Needs
4/16/2023 (Permalink)
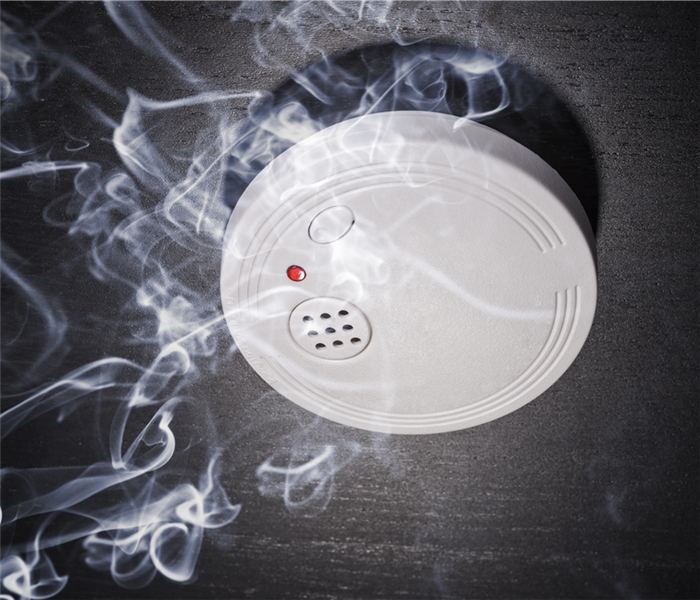 Choosing the right smoke detector for your family home is essential for your safety.
Smoke detectors are an essential safety feature for any family home. They alert you to the presence of smoke, which could indicate a fire, allowing you and your family to quickly evacuate and call for help. But with so many different types of smoke detectors available, it can be challenging to know which one to choose. In this blog post, we will discuss the different types of smoke detectors and help you make an informed decision.
Ionization Smoke Detectors
Ionization smoke detectors are the most common type of smoke detector found in homes. They use a small amount of radioactive material to detect smoke particles. When smoke enters the detector, it disrupts the ion flow, triggering the alarm. Ionization smoke detectors are more sensitive to fast-burning fires and are cheaper than other types of detectors. However, they are less effective at detecting smoldering fires.
Photoelectric Smoke Detectors
Photoelectric smoke detectors use a light source and a sensor to detect smoke. When smoke enters the detector, it scatters the light, triggering the alarm. Photoelectric smoke detectors are more effective at detecting smoldering fires and are less likely to trigger false alarms. They are more expensive than ionization detectors, but many experts recommend using a combination of both types for maximum safety.
Dual-Sensor Smoke Detectors
Dual-sensor smoke detectors use both ionization and photoelectric technology to detect smoke. They offer the best of both worlds, making them the most effective type of smoke detector. However, they are also the most expensive.
Smart Smoke Detectors
Smart smoke detectors connect to your home's Wi-Fi and send alerts to your phone if the alarm goes off. Some smart detectors can even detect carbon monoxide and natural gas leaks. They also provide the added benefit of being able to silence false alarms from your phone. Smart smoke detectors are more expensive than traditional detectors, but they offer added convenience and peace of mind.
Factors to Consider
When choosing a smoke detector, there are several factors to consider. The number of detectors you need will depend on the size and layout of your home. At a minimum, you should have one detector on each level of your home and one in every bedroom. You should also make sure your smoke detectors are interconnected, so if one goes off, they all go off.
You should also consider the power source of your smoke detector. Battery-powered detectors are the most common, but they require regular battery replacement. Hardwired detectors are connected to your home's electrical system, so they don't need batteries, but they require professional installation.
In addition to the type of smoke detector you choose, you should also consider other safety features. Some detectors come with a built-in carbon monoxide detector, which can alert you to the presence of this deadly gas. Others come with a long-life battery that can last for up to 10 years, reducing the need for frequent battery replacement.
In conclusion, choosing the right smoke detector for your family home is essential for your safety. Consider the different types of detectors available and choose the one that best suits your needs and budget. Remember to install detectors on every level of your home, in every bedroom, and ensure they are interconnected. Finally, make sure to test your smoke detectors regularly and replace batteries as needed to ensure they are always functioning correctly.
Is Water Damage Covered Under My Homeowners Insurance Policy?
3/16/2023 (Permalink)
 Water damage is common, make sure to have the right homeowner insurance.
Water damage can be a stressful and expensive experience. If your home was damaged by water, you may be wondering if your homeowner's insurance policy covers the cost of repairing the damage. Here, we'll take a look at how water damage is covered by home insurance policies and how to protect yourself from this risk in the future.
Is Water Damage Covered by Homeowners Insurance?
Most homeowners insurance policies will cover water damage to your home, but not all of them do. And even if your policy does cover it, that doesn't mean you're off the hook for paying out-of-pocket expenses.
The first thing to know is that there are two types of water damage: external and internal. External means rain or snow coming through the roof; internal means a burst pipe or leaky faucet somewhere inside your house.
The answer to this question depends on three main factors: your policy type, where the water damage originated from, and whether it was accidental or wear-and-tear.
What is your Policy Type?
If your policy is a standard one, then you may be covered. A standard homeowner's insurance policy is designed to cover losses from water damage, fire, theft, and other perils that are common to most homes. If you have a named peril policy or an umbrella policy, there are certain exclusions that apply which could mean that water damage is/isn't covered under these types of policies either. At the end of the day, coverage depends on your policy type. Understanding your policy and its coverage is important in order to be prepared for unexpected losses.
Where did the Water Damage Originate from?
If you're wondering whether your homeowner's insurance policy covers water damage, the next question to ask yourself is: where did the water damage originate from? In other words, was it caused by a storm or natural disaster or by a burst or leaking pipe?
If you are dealing with water damage from a burst pipe or a leaking appliance, then this is likely covered by your homeowner's insurance. However, if the source of the water loss is a flood--then there's no guarantee that your insurer will cover any repairs needed as a result of this type of incident.
Was it Accidental or Wear-and-Tear?
The difference between accidental and wear-and-tear water damage is in the cause. Accidental damage happens when a sudden, unexpected event like a burst pipe or an appliance leak causes water damage. Wear-and-tear water damage occurs because of gradual deterioration to your property's structure or foundation over time, such as cracks in the walls or foundation, or leaks that go untouched for extended periods of time.
Water damage is a common problem and one that can be very expensive to fix. If you have water damage, your home insurance will most likely cover it, but there are exceptions. You should always check with your agent when buying homeowners insurance.


 24/7 Emergency Service